
How to create a schedule
You can create a schedule board of tasks and activities, track their completion and provide choices to select from when they are completed.
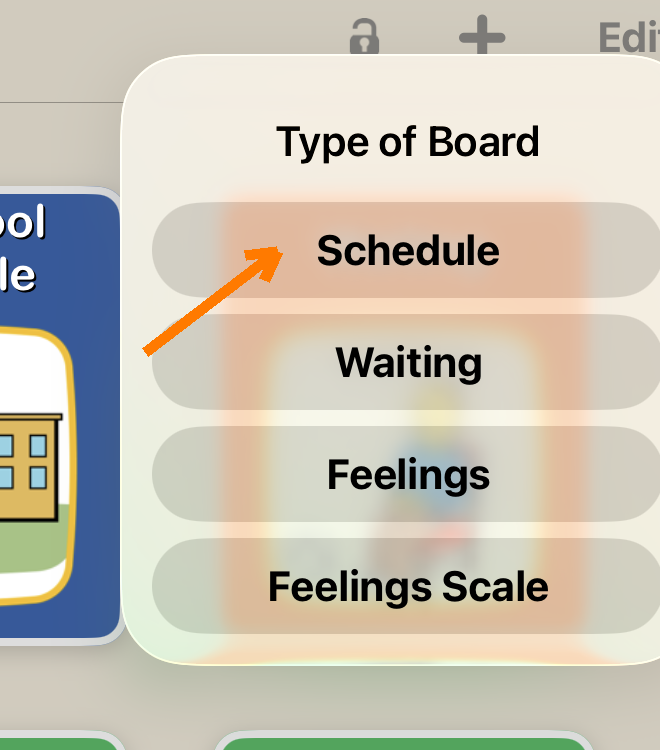
1. Add new board
Tap the plus (+) icon in the top right to bring up the new board menu. Select Schedule to create a blank schedule board.
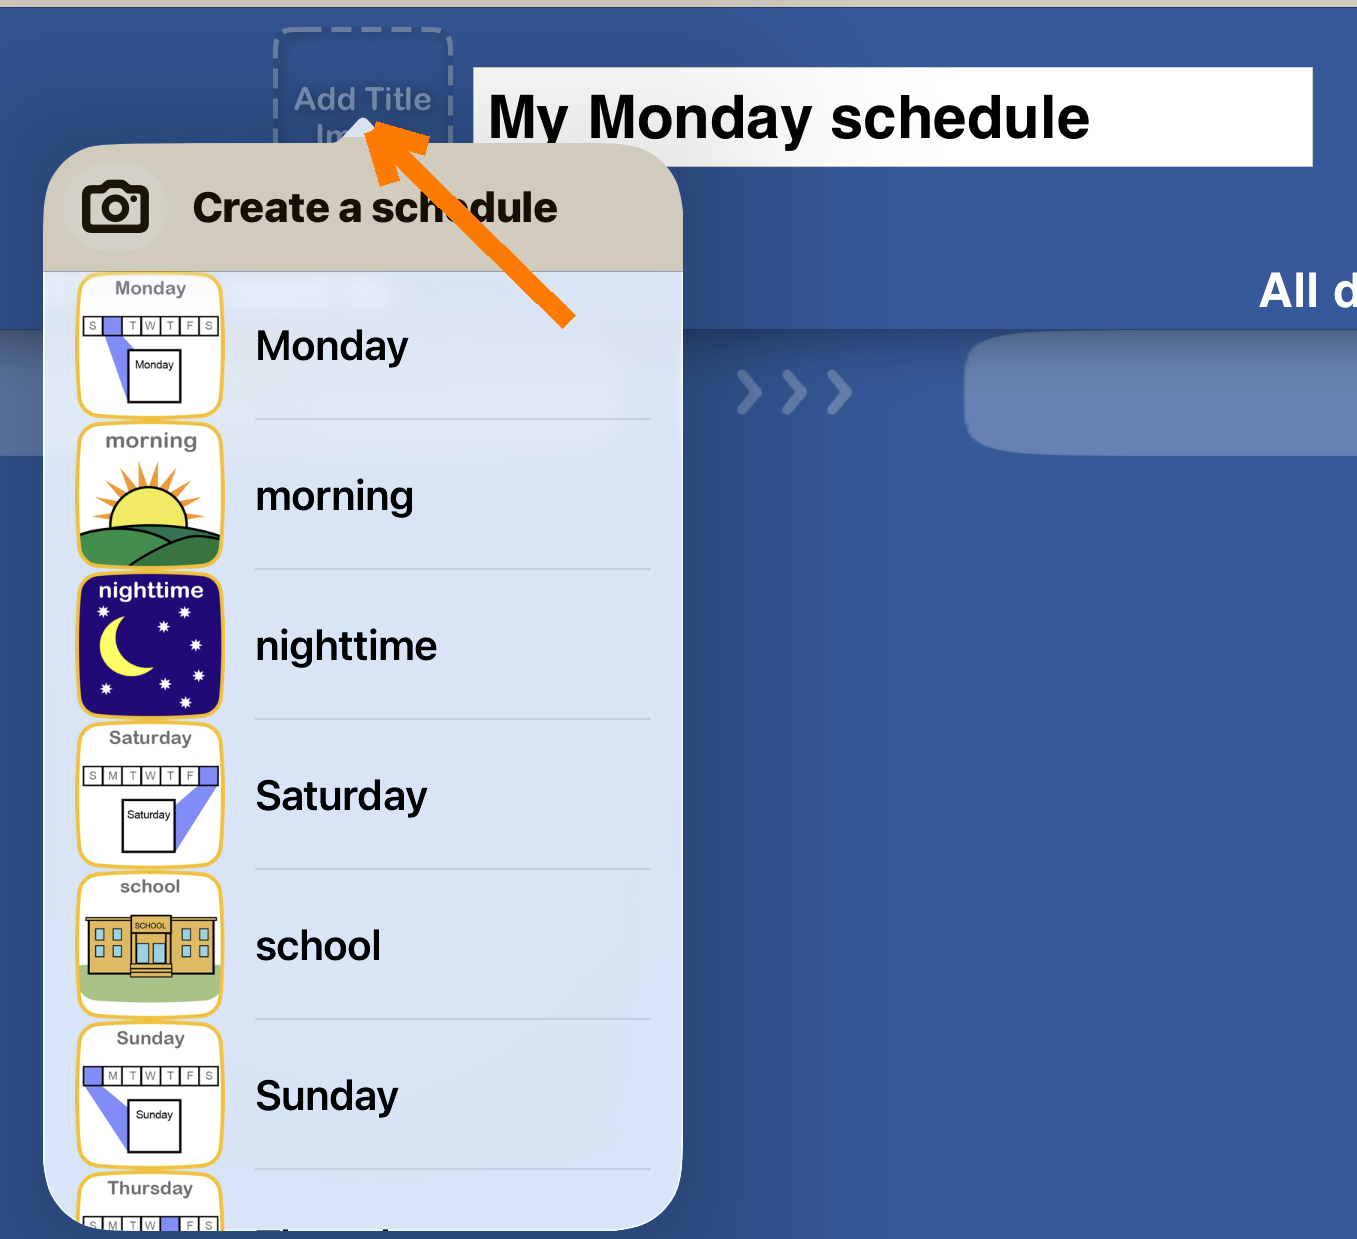
2. Set schedule title
Select schedule title image. The text box to the right of the image will automatically be filled in but you can tap it to change the title text.
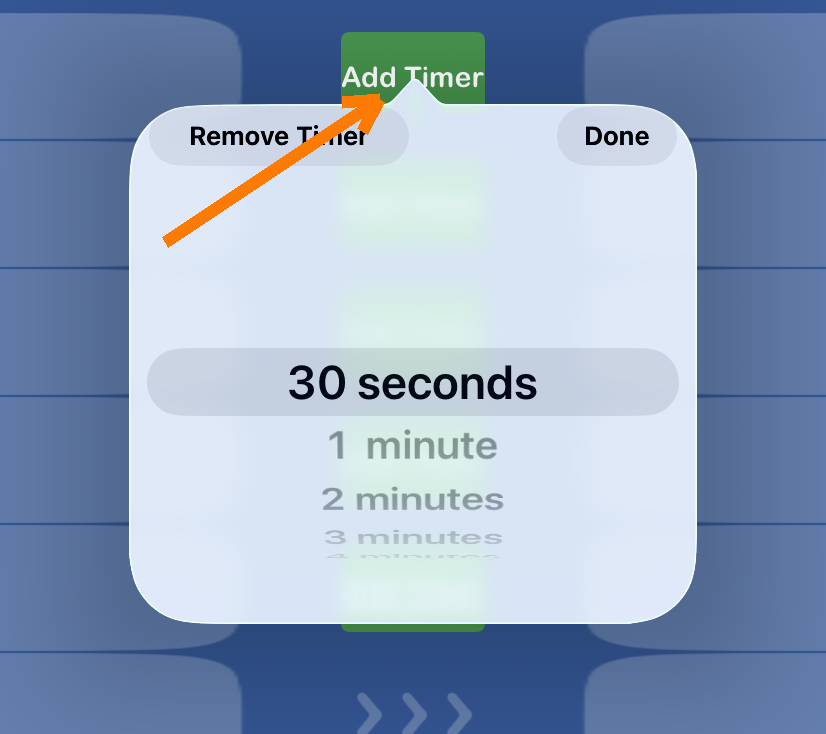
4. Add timers
If you want to set a time limit for a task, then tap the "Add Timer" button to add a timer to the task.
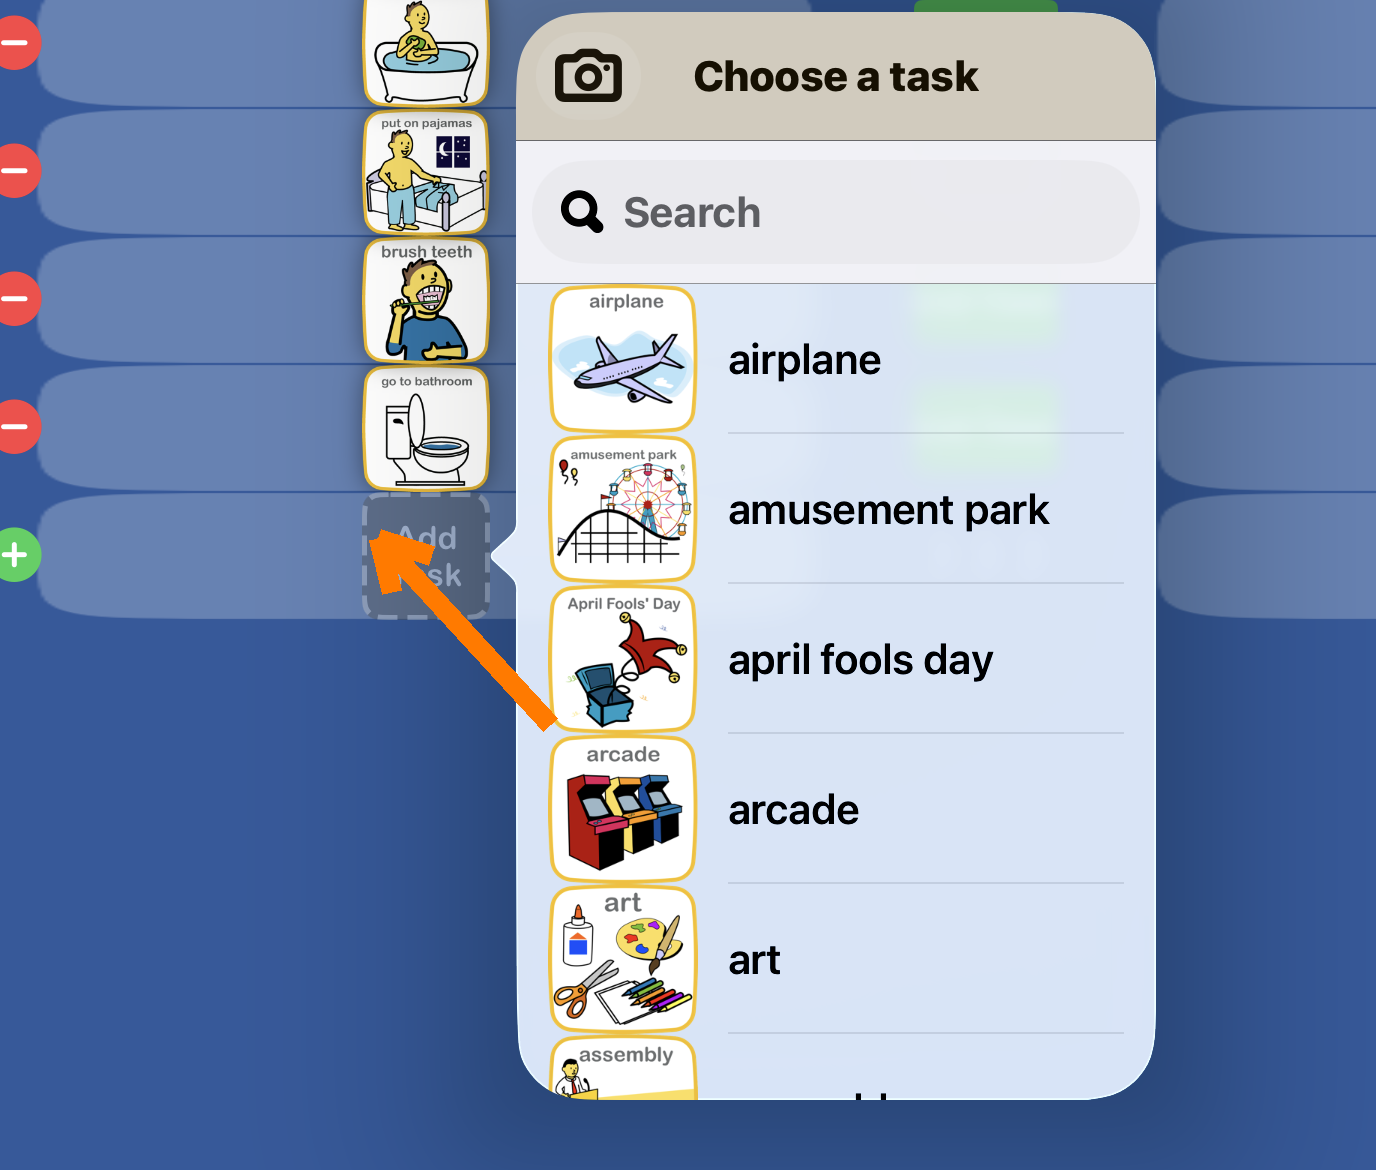
3. Add tasks
Tap the "Add Task" box to add task images. An unlimited number of tasks can be added.
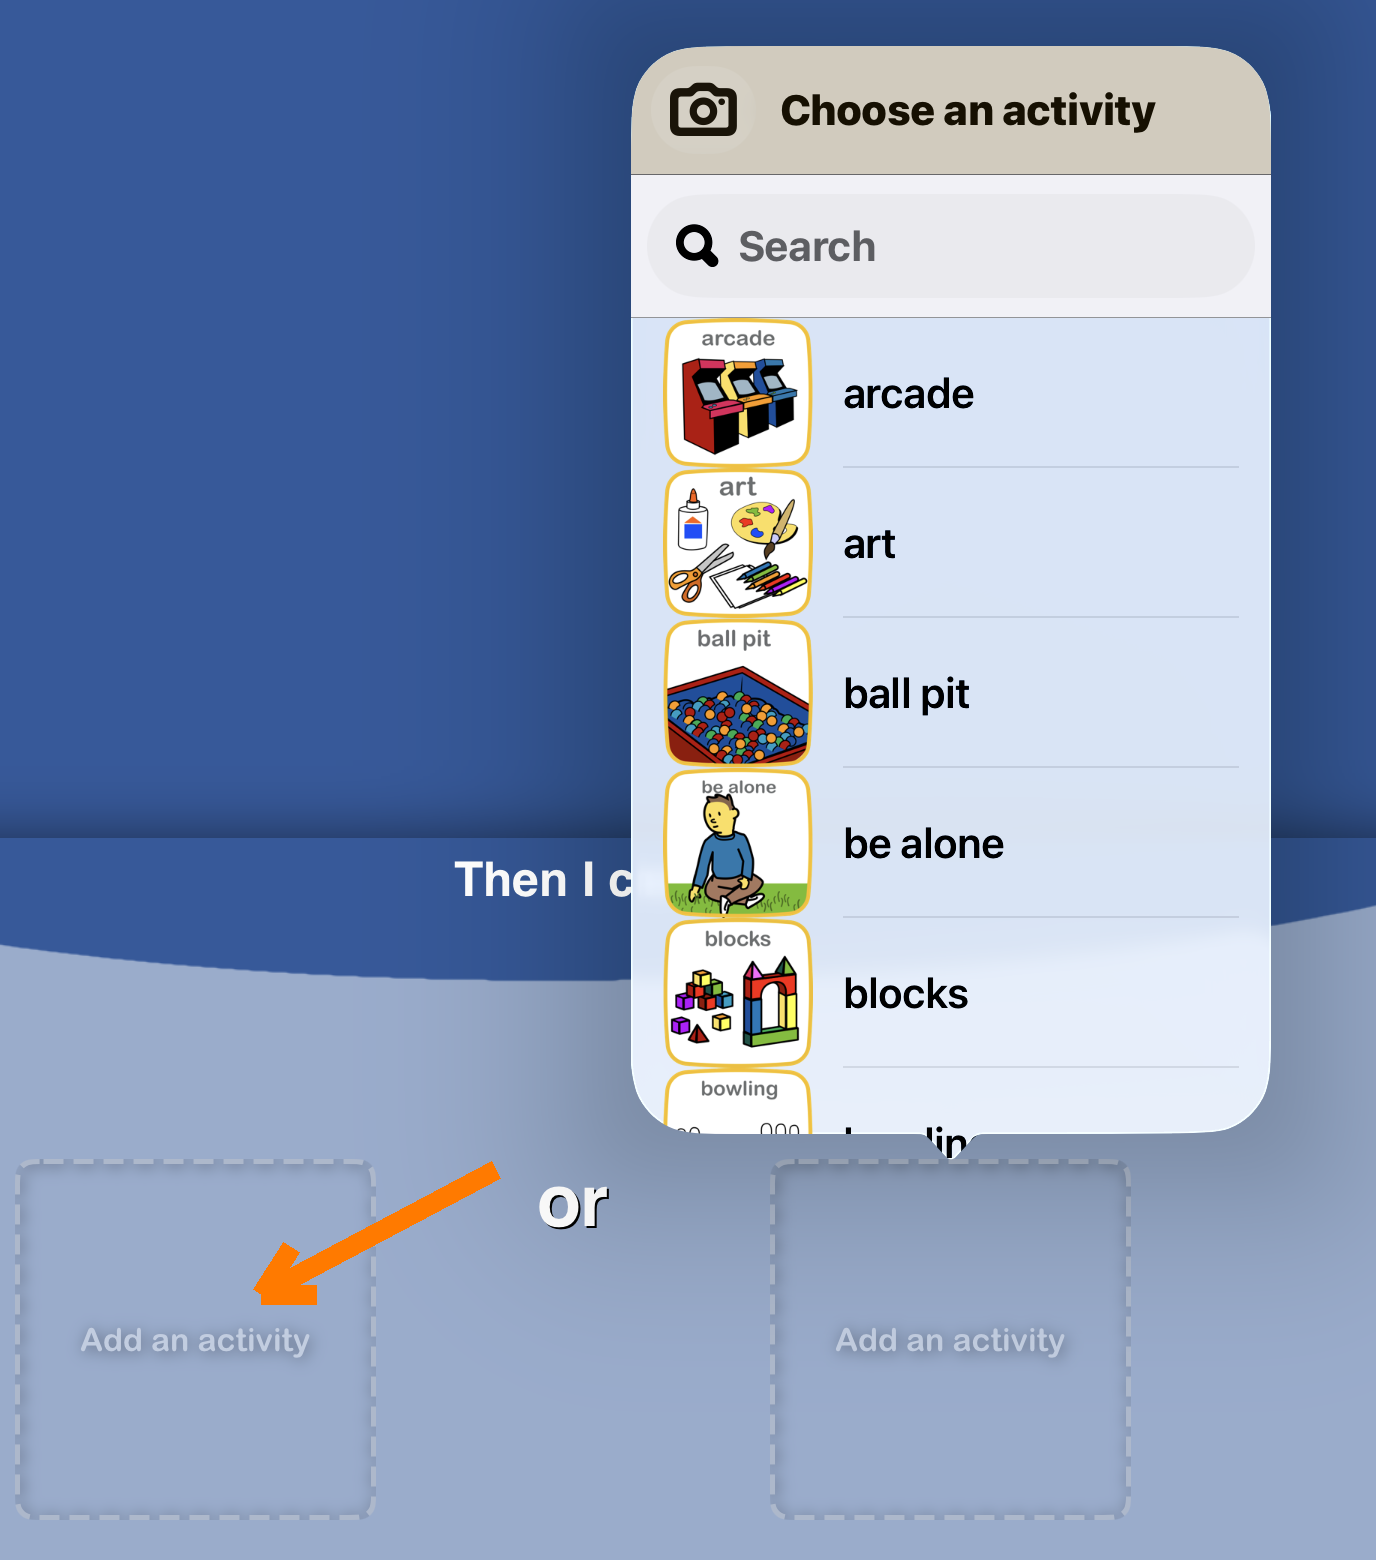
5. Add activities
Tap the "Add activity" boxes to add activity images. After all tasks are done, the child can select from one of these choices as a reward for completing the schedule.
6. Save schedule
After all images are set and necessary adjustments are made, tap the "Save" button in the top right to change from edit mode to user mode. The board is now ready to use.
Use the play button to have the text the entire board read out loud or tap an individual image for just that image's audio.
The currently active task will be slightly larger than the rest to bring attention to it. When the task is done, it can be dragged to the "All done" column. The next task will then be enlarged.
If a timer is assigned to a task, it will appear in the middle column when the task because active. Tap the timer to start it.
When tasks are all done, the child can tap from one of the activities on the bottom to select their reward.
